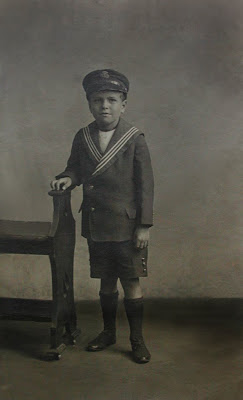
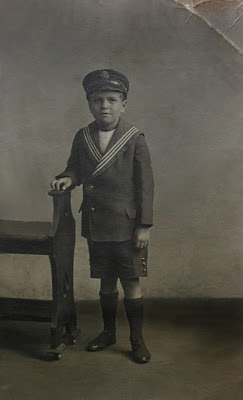
I've had several assignments, and have posted some if the pictures on REEN. But honestly, most of the pictures for my digital photography class have been quite boring. I haven't been "into" that class, and have wondered why I'm taking it at all. I though I was going to learn about Photoshop Elements, which until this week I had only learned how to resize an image and do some basic things that can be learned by clicking around for half an hour on your own. This weeks assignment was to restore and old, creased, discolored photograph. He had one that we had to download, then use the textbook and figure it out. I was not thrilled. I wanted someone to take me step-by-step and explain to me what to do! If I wanted to read a book to figure it out, why the heck am I paying to take the class?!?! Oh well, I have been trying to keep up with most of the reading, which is quite dry and hard to retain. So, last night I sat down to attempt to restore this picture:
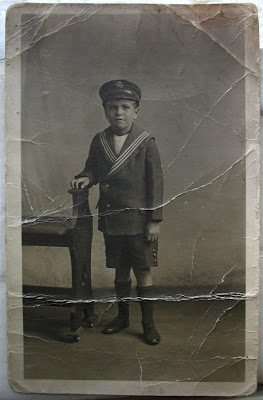
Looks like fun doesn't it? Wish it was you, don't you?!?!
I started out by cropping the edges off as he did with his "student example."
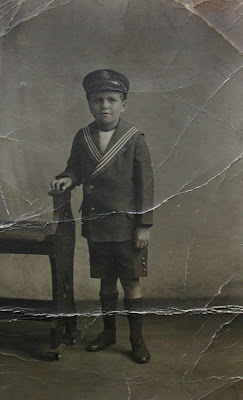
I then started smoothing out some of the creases at the top with the "clone stamp" tool. At that point it was well after 11:30pm on a Friday night (maybe this is pathetic, but whatever), and I was exhausted. My eyes were closing as I was doing this, so I figured it would be better left for today.
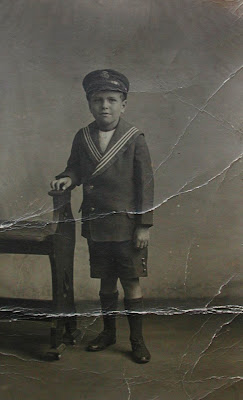
When I started again today, I realized that I didn't like how it looked, wanted to read some more, and started over. I started again with the cropped image and decided to start at the bottom this time.
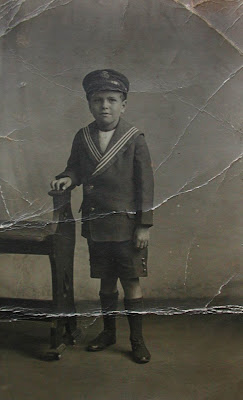
Almost all the creases out!
(I also used the "burn" tool to darken some of the floor areas because they seemed really light even after getting most of the crease lines out. I don't know if we were "supposed" to do this, but I like how it looks.)
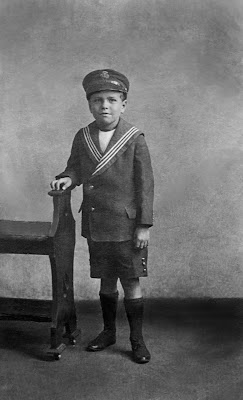
I then changed it back to black and white like it was supposed to be.

Then I darkened in under the brim of his had to give it a little more depth and definition as well as adjusted the lighting/contrast just slightly.

Next, I whitened some spots on his undershirt and smudged some areas on the ground.
The finished product!!!
When we turn assignments in, we can also see what other people have turned in. As I have opened and viewed others work, I am shocked and amazed...but not really...that so many of them have the exact same markings as the "student example." (At least four when I looked a few hours ago.) If you are actually doing your own work, using the "clone stamp" tool to get the creases out, there is no way that your hand is going to move the same way as anyone elses to get the same lines in the same places. I think they tried to cover it up by changing the contrast or lighting levels, but its quite obvious to me. I can only hope that my teacher looks at it for longer than two seconds and realizes what they are doing. I don't want to be whinny or anything, but if I can spend three/four hours figuring this out when I have a lot going on...so can any of them!
2 comments:
Holy Cow! The difference is freaking awesome. I am amazed at how well the picture turned out and what you can now see. I wonder if people do this sort of thing all the time. I sure wish I had some photos of my grandparents for you to do this too. I remember as a kid looking at some of these photos wondering what it looked like before the age and wear. This is a neat thing to know.
Nicely done! It takes me forever to do this!!! And I am still not getting better at using Elements.
Post a Comment